First steps with Claude Code
Find your way around the app and get started with some data analysis.
Sign in, then open Code
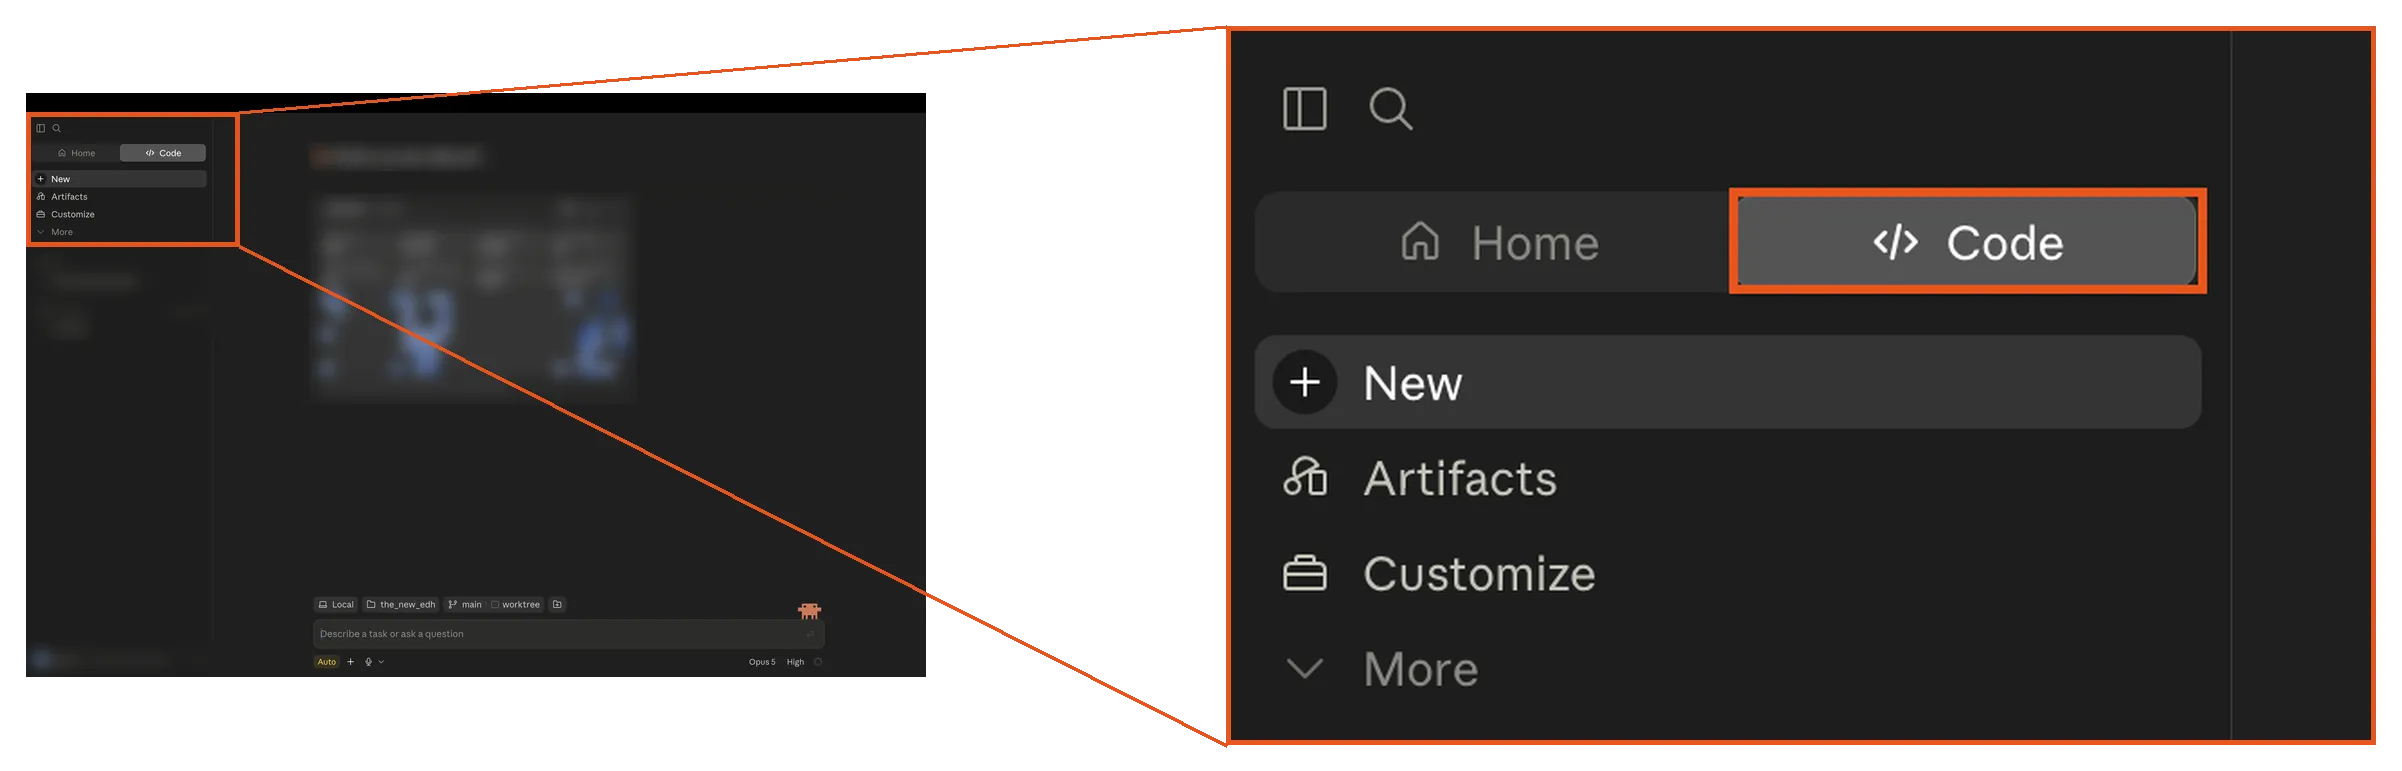
Launch the Claude Desktop app and sign in. You can choose between Home and Code at the top left corner. Home is just the regular Claude Chatbot. It’s useful in some cases but doesn’t create or modify files on your computer. Claude Code does that and is behind the Code tab.
Select a folder to work in
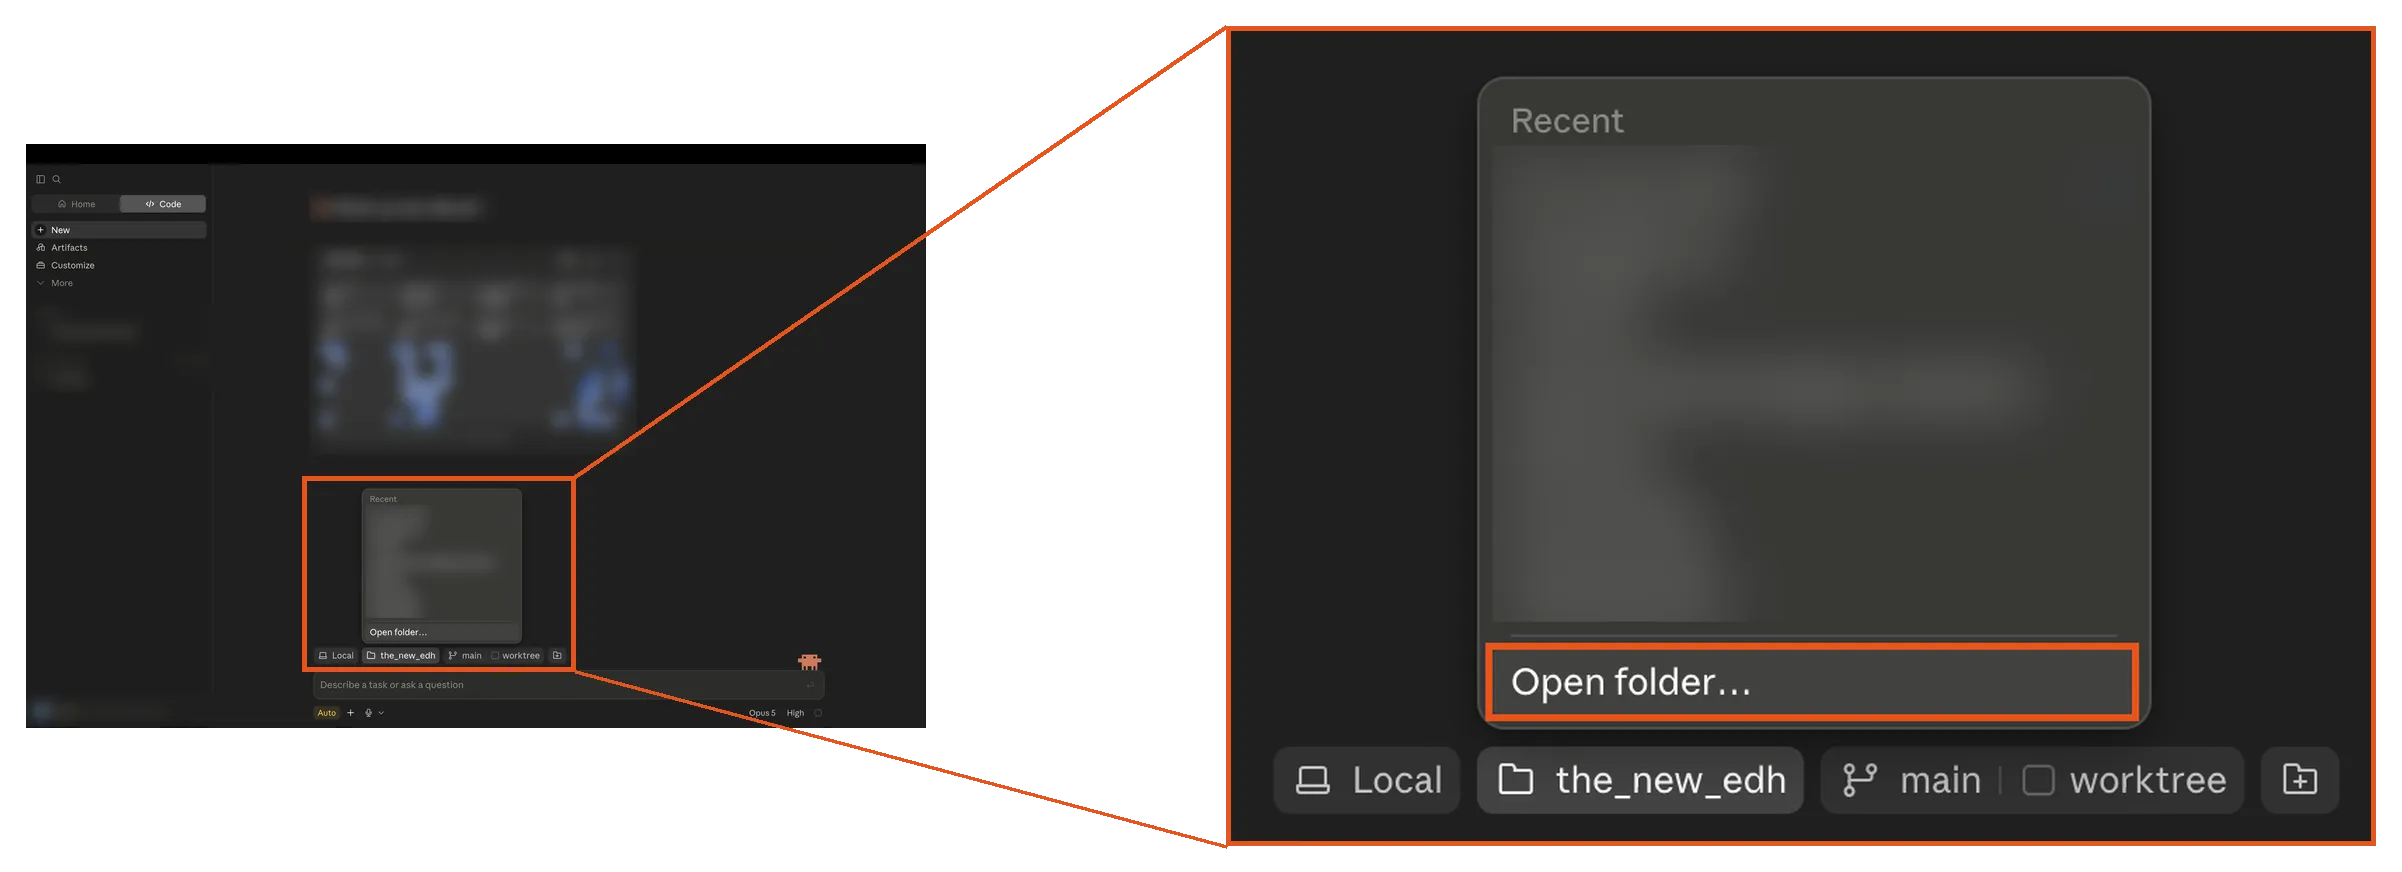
First, select a folder to work in. The model can read and modify existing files inside this folder plus create new ones. To get started, create a folder called Claude Code on your desktop and select it.
The basics
These are the six controls you will use most.
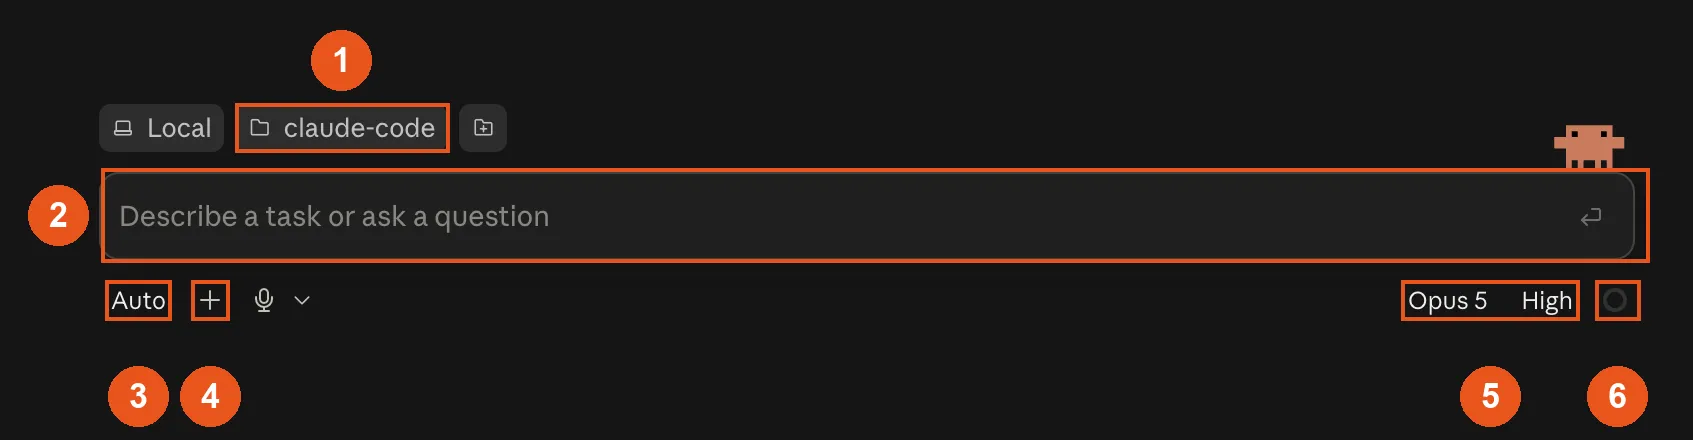
- The folder you are working in. Click it to switch.
- The prompt box. Tell Claude what you want to do. Don’t be too detailed.
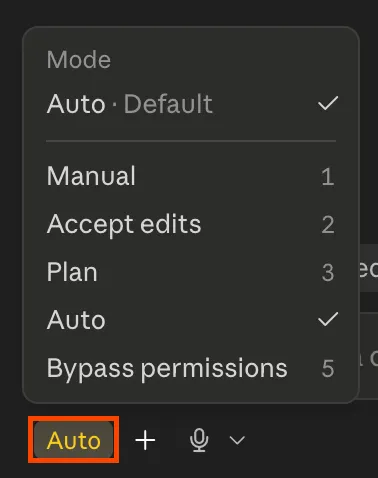
- Mode. Switch between Plan mode or Auto mode (more on that in the next step).
- Attach. Add things like files or a second folder to work in.
- Model and effort. Which model, and how long it thinks before it answers. Opus on High is a good default. Turning the effort up further mostly buys you waiting.
- Usage and context. Your plan gives you a usage budget. A bigger plan, a bigger budget. If you hit the limit, you wait a while before you can carry on. Context is the other limit: how much of the session Claude holds at once. The closer you get to a full context window, the worse Claude’s output gets.
Plan mode vs. Auto mode
There are five modes. You only need two.
In plan mode Claude writes a plan and shows it to you before it changes anything. In auto mode it starts work right away. The bigger the task, the more plan mode makes sense.
Let's make an example
Here is some data from a DoE. Download it and put it inside your Claude Code folder.
Download ↓Ask for a report
The folder contains data of a DoE I performed. Please create a summary technical report as html file.
Usually I’d recommend going back and forth a bit to figure out what belongs in the report and what doesn’t. It’s your work after all. You are responsible and you need to understand it. In this case we take a shortcut though.
Create any file format you want
I really recommend experimenting with HTML files because you can do a lot of crazy stuff, like making them interactive. But if you prefer the traditional file formats, that’s possible too.
Also create a summary as power point presentation please.
Let's make the output yours
The output you just got is probably amazing on a first look but not that great on the second. Maybe too much text and not in the style you would write the report. It’s kind of generic.
So the next tutorial is about how to make the output the way you want it.
03Coming nextMake the output yours→Steps last checked 2026 · 08 · 08. If one no longer matches what you see, tell me.